How to Engage in Networking
You can have the opportunity to connect with other attendees of the event, by enabling Networking. Find below the steps to follow:
- From the event Overview, on the right side; scroll down to locate the Networking section
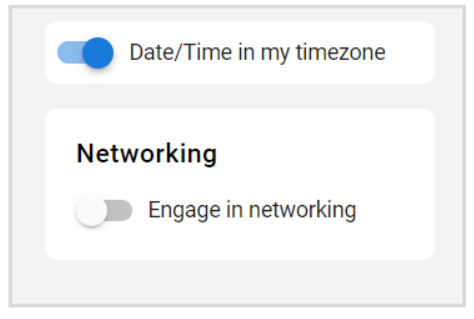
- To enable/disable, toggle ON/OFF
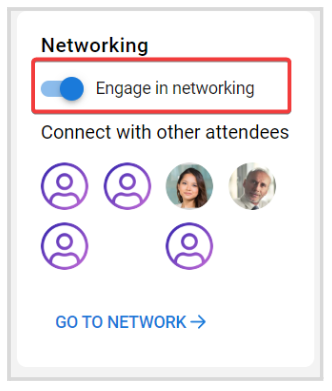
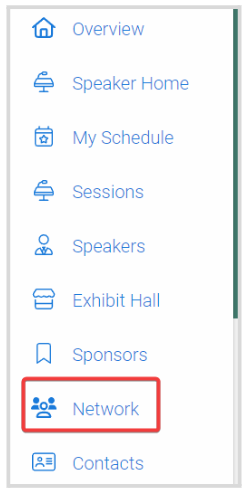
- Once enabled, a Network tab will be added on your left panel
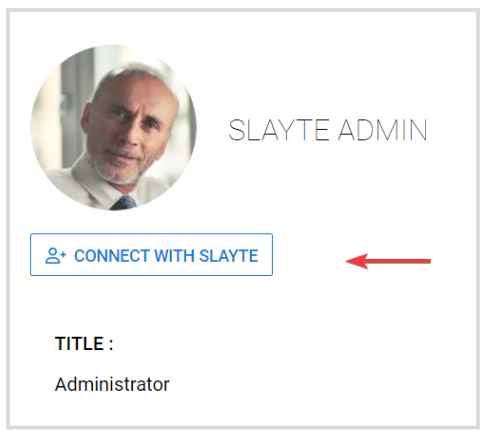
- From here, you can search by name or browse by scrolling down to all attendees. Click the attendee's tile for more profile details, and you can also send an invitation by clicking the Connect With icon
Related Articles
Mobile App Networking Features for Events
The event's mobile app makes it easy to meet new people; whether you are searching for a speaker, chatting with fellow attendees, or setting up a private meeting, every networking tool is just a tap away. Use the steps below to explore each feature ...Plan for Networking
As a Super Administrator you will be able to edit the user profile template in the Admin console under Users > Profile to create custom fields for the user profile and in the Conference you will be able to select which fields are displayed. Create ...Event's Activity Feed
The Activity Feed brings a social, community-driven space directly to the main page of your event. It serves as a central hub where attendees can post updates, share thoughts, and interact with each other in real time, making the event more dynamic ...Gamification - Admin Configuration
What Is Gamification? Gamification turns your virtual event into an engaging, interactive experience by tapping into attendees’ natural desires for achievement, competition and recognition; attendees complete tasks, earn points, level up and collect ...Release Notes 05/15/2025
This release introduces private meeting functionality, optimizes integration with Impexium, and adds key improvements to invoicing and chat interactions. Backend efficiencies and notification features enhance both user experience and system ...