Event Logistics Configuration
You can specify a workflow and assign team members to assist with the logistics of the event.
Create statuses and define whether it represents an Alert. A session with an Alert status triggers an automatic notification to all emails listed under "Alert Emails." for them to act as needed. Additionally, your team can easily filter any session in an Alert state as it shows up in the red Alert button in the sessions table.
-
Go to Events, click on the desired event title
-
From the left panel, click Logistics
-
To start/update the setup, click the gear icon
 located in the right top corner.
- Time frame: Check this box to only see sessions with a start date set in the future or that are currently in progress.
- Table: Select whether you would like sessions to show as a table instead of cards.
Cards view:

Table View:

- Additional Columns: Select which categories/fields of sessions you want to see as columns, in addition to Status, Date, and Title.
- Additional Detail Fields: Select which categories/fields of sessions you want to see as details on the session, in addition to Status, Date, and Title.
- Statuses: create a status by typing the name you would like to assign and pressing enter

Once created, you can assign a preferred color by clicking the color field, rename, rearrange them, set Alert, or delete if no longer needed.
- Alert Emails: Add users via their email address that will receive the session Alerts notifications
- Additional Logistics Access: Add users below who should have access to the logistics functionality, in addition to administrators.
- Click Save Configuration

Once customized, you can view all sessions by clicking anywhere in the session field or filtering for specific sessions

From within each session, you will have access to the following information:
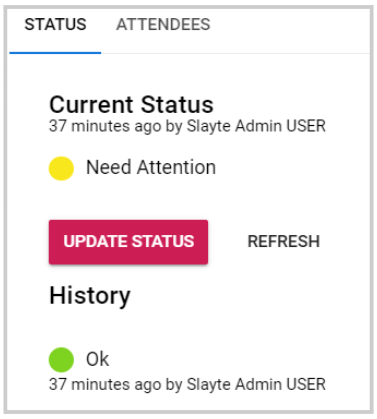
- Status and history. You can click Update Status to assign a new status.

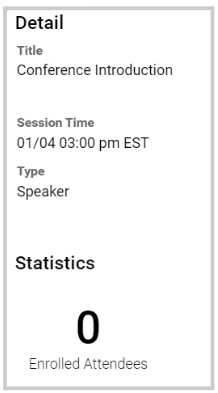
- Session Detail and Statistics

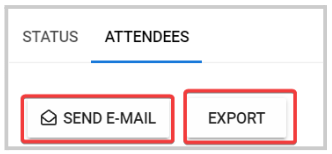
- Attendees. Will display a list of all attendees for the selected session, and you will be able to Send Email to some or all of them or Export the list

Related Articles
Reset Logistics for Event
Go to the desired event From the left panel, click Logistics Click the gear icon on the right top corner Click the Logistic Configurations tab Scroll to the bottom of the window to the Actionssection and click Reset Logistics for Event From the ...Logistics Alerts
Go to Events, click the desired event tile From the left panel, click Logistics You can locate any alerts on the left top corner of the main page, then click the Alert button It will display the Showing Alert view which will include only affected ...Event Module Branding Configuration
Effective branding is essential for the success of any event; the Home or Overview page of your event website presents an excellent opportunity to showcase brand identity and convey essential information. This page combines several key elements to ...Change Event Status
Each event in Slayte has a Status that controls who can access it and what actions are available. Updating the status allows administrators to manage the event’s lifecycle, from initial setup to preparation, publishing, and going live. Choosing the ...Set Reporting Configuration
From the Home page select Events from the tile or from the left pane Select the desired event Select General Scroll down to Reporting Configuration and set Reporting Timeframe date with Slayte's calendar Select SAVE when finished